Well, today we are going to learn! I was taught a year ago, and now I want all my gifts to have these darling bows.
First, pick up a spool of festive ribbon from your local craft store. Make sure the ribbon has a
wired edge.
Next, bend a section of the ribbon. I find that the size in the photo works great, but you can adjust it for smaller or larger bows.
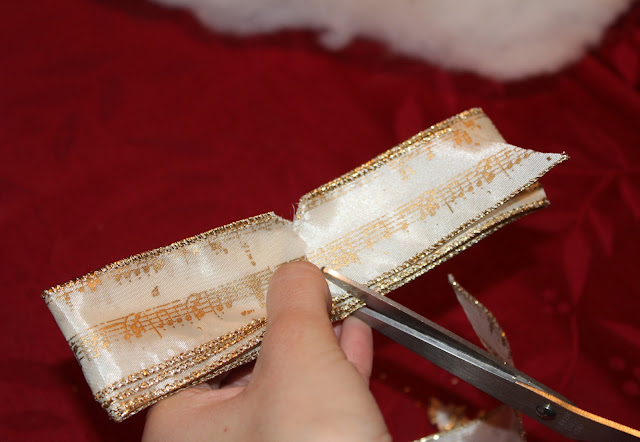
Fold the ribbon 9 times. If the ribbon has a pattern on only one side, make sure the pattern is facing right-side-up. Then, cut it off from the remaining ribbon.
Bend the bunch of ribbon in half and cut a very small v in the middle on each side.
Use some extra wire from one edge of the remaining ribbon to twist a tight knot in between the v's. Later, you can use the wire ends to tie the bow to a package or basket.
Starting on one side, pull out the inner-most loop, twist it clockwise, and open it up.
Repeat this step until all loops are pulled out and opened up on both sides.
And there you have created a fanciful bow to dress up any holiday gift, basket, or decor.
Happy bow making!
~Jess~


23 comments:
Thanks Sheri ... I will definitely give this a try and hopefully some of my pressies will have lovely bows on them now! M x
Thank-you so much... I was making a bow the ordinary way this morning and thought I really need to learn the fancy one!! Talk about timely!
Jess, You have helped many of us with this lesson, I have done the notching thing for years. With wire ribbon, it is so easy to puff the bow up. Love your musical ribbon.:):) Smiles, Susie
This is such a clever way to make a bow for a gift.. I will certainly remember Jess.
Thank you for sharing
val
I love this. And I love more your music inspired ribbon.
I love wired ribbons. They make all the work more pratical and less prone to "accidents". Red and Music - what a fabulous combo.
Enjoy the Season!
THANK YOU JESS! I could never figure out how these are done!
Happy December all of you dears! Anita
Lovely !!!....happy first advent week Jess...love Ria...xxx...
I always want to do these and justnever sit down to do it. The sheet music print makes these classic, not just for Christmas but after, too! Very pretty!
Thank you for sharing bow making. I took a little class years ago and they did not show the V cut. I think this really helps a lot.
Great tutorial Jess.
Hi Sheri, hope you are doing well. Thinking of you and wishing you a wonderful week.
hugs, Celestina Marie
Thank you Jess for sharing the wonderful tutorial of bow making.
Have a great week
hugs
Carolyn
Such beautiful bows! I like the musical note ribbon as well. Thanks for sharing how to make them..I will have to try and make some :)
Have a lovely week.
Magie x
Beautifully!I like this bow on the gift.I like to make these beauties!Thank you!
Love it, Jess. That does make a nice, easy bow, doesn't it? I also use the twist and turn method sometimes- xo Diana
Hi Jess!!! SHERI DARLING......wherever you are...thank you for coming to visit my CUBAN SUGAR POST! teeheee....I knew I had to do something with that music when my cousin introduced me to it this summer!
I am so happy that you received the package. ENJOY all of the contents inside. Love from my heart, Anita
how neat...
I've never known how to make my own bows like this before. So lovely. I love how big and full they are. I bet they would look stunning on a wreath too!
Jess this is wonderful! I love your bows!
Thanks for taking the time to show and tell!
Deborah xo
Jess, I'd like to thank you for this wonderful bow tutorial. I love wired ribbon...it makes the prettiest bows! I think that a ribbon making party is a great idea. How much fun!
xo,
RJ
Thanks for the demonstration!
Dear, thanks for your lovelly comment on my blog!
These bows are stunnng - thanks for the demo.
I'm going to give them a try - I know I have some wired ribbon - somewhere!
Caroline xxx
I'm going to Michaels right now and getting bows! Thanks for the tip!
I can't wait to try this. They are so pretty and I've always wondered how to do it. Thanks so much for the lesson.
Post a Comment